In this post I’ll show you how to make salami yourself. As a cured sausage, salami is one of the most demanding types of sausage to make yourself.
It has a special consistency, a spicy smell and a distinctive aroma.
Salami production is very challenging because you need a certain ambient temperature and humidity for optimal curing and fermentation.
The best way to do this is with a maturation chamber. Because this is nothing anyone just has at home, I also explained a method without a maturation chamber in this post.
In this article you will find a summary of all the necessary information to make salami at home. Please make sure to ready everything.
Of course, you will also find salami recipes and an explanatory video.
Have fun and good luck making it!
Table of Contents
Making Salami at home – What you need
There are many types of salami. Most of them are delicious. Please find my base recipe below:
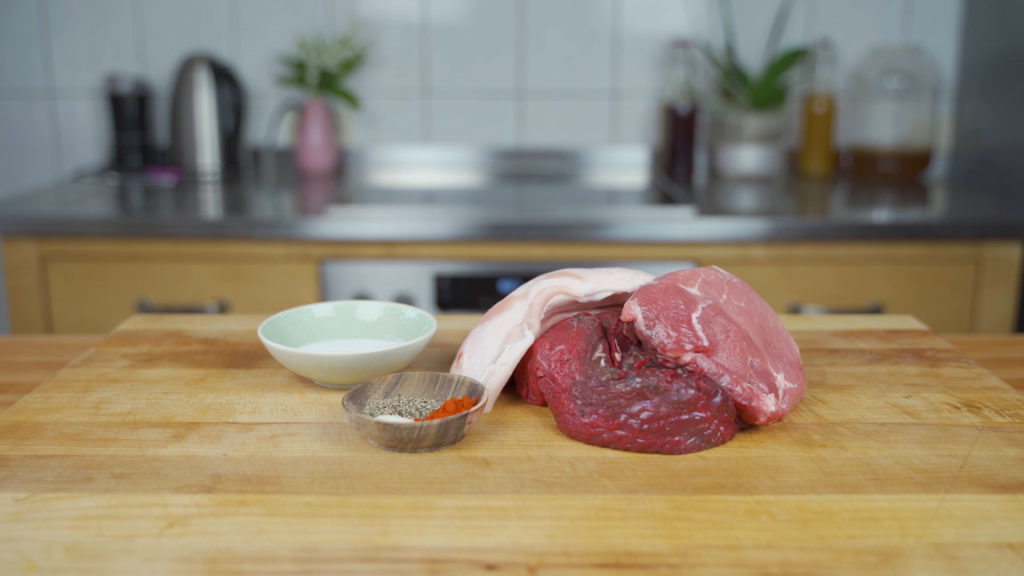
Meat for 1 kg Salami:
- 35 % lean pork (350 g)
- 35 % lean beef (350 g)
- 30 % pork backfat (300 g)
Spices per 1 kg meat:
- 25.5 g salt
- 2.5 g Cure #2 (#1 also works)
- 2 g dextrose
- 2 g black pepper
- 2 g paprika
Equipment you need to make Salami
You need a meat grinder to “grind” the meat. The meat is chopped into small chunks and can then be mixed.
Sausage stuffer / Grinder attachment / Funnel
You need this to get your sausage mass into the casing. If you do not have one, you can also use a filling attachment for your meat grinder or a hand filling funnel.
Spice grinder/ mortar:
Freshly ground spices taste best. But of course, you can also use ground ones. It is best to use a spice grinder. Alternatively, you can use a mortar. You just need to take care, that the spices are completely ground.
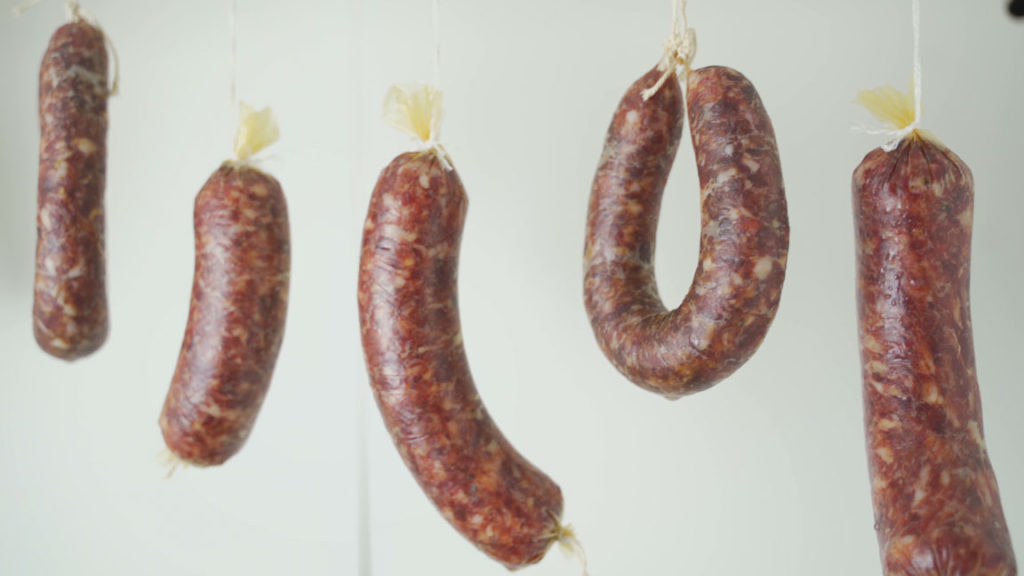
Casings
For maturing cured sausages you need special artificial casings. I recommend fiber casings in caliber 55/25.
The casings can also be smoked and support the ripening process ideally.
If you want to make thinner Salami, you can also use natural pork casings caliber 28/30
Place to dry and mature the sausage
To age this raw sausage, you need an environment where both humidity and temperature are relatively constant. There are several possibilities for this. I have already matured cured sausages in the fridge or cellar without any problems.
Optional: If you want to be on the safe side, then a ripening cabinet is the best choice. My recommendation: Dry Ager DX 500
Homemade Salami – Step-By-Step Instructions
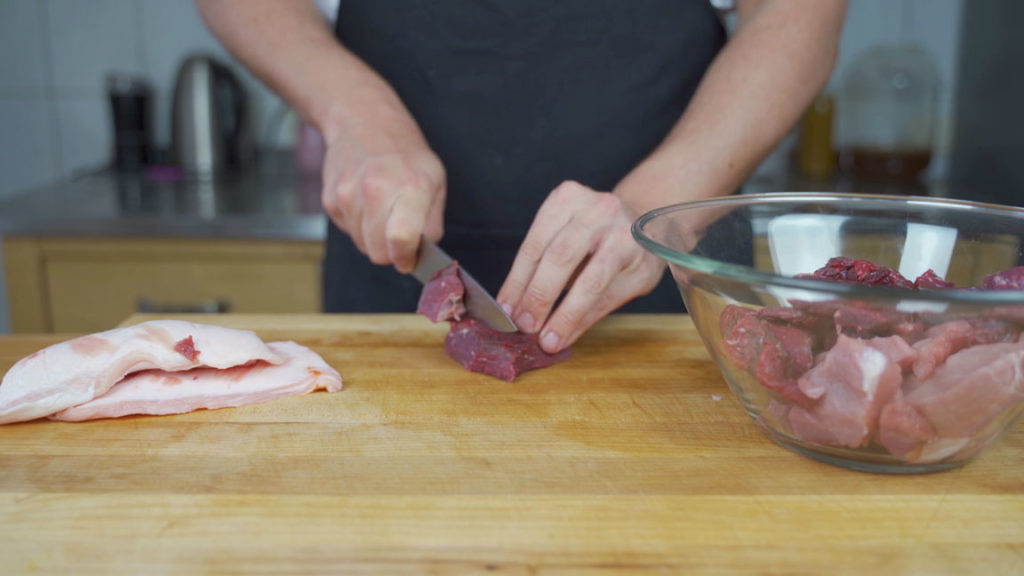
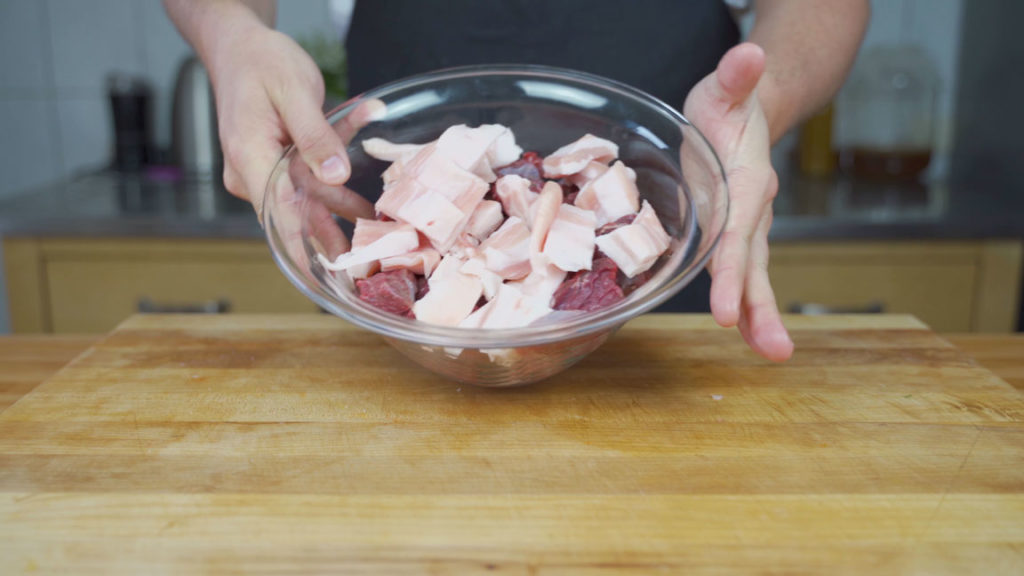
1. Cut the meat into strips or cubes. You can vary the size depending on how big your meat grinder is.
3. Put it into the freezer for 1-2 hours. This will help your grinding process later and make sure that the mixture does not get too warm.
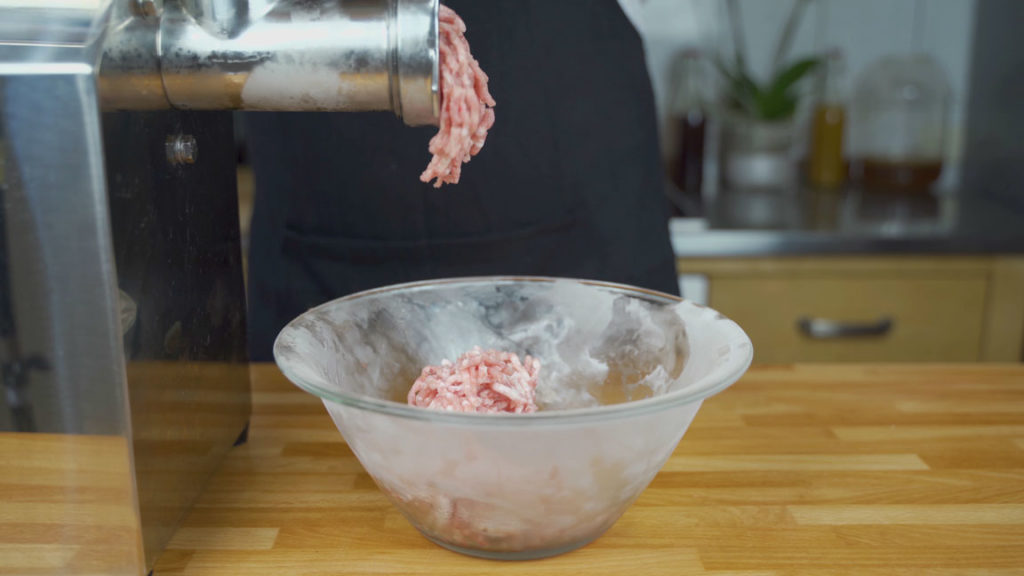
3. Now you can grind the meat. I used the medium perforated disc (4.5 mm). You want to grind the meat coarse. Also make sure that the meat is cold when you grind it.
4. Add the salt, cure and spices to the meat and massage them in.
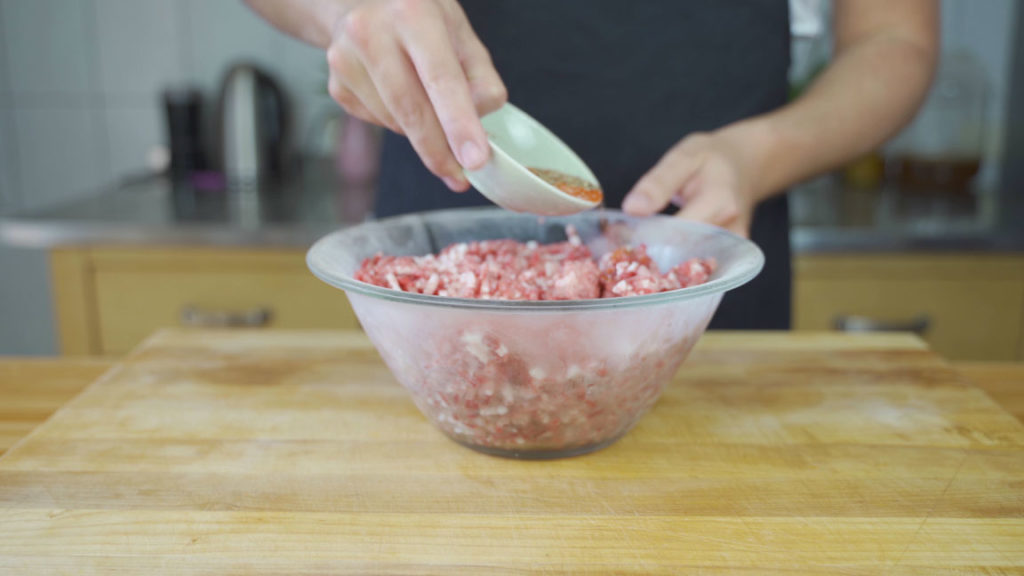
5. Mix the meat mass for 2-3 minutes. You can either knead the meat with a food processor with a kneading attachment or mix it vigorously by hand. This ensures that the sausage meat will bind well and the sausage will not be crumbly later on.

6. Now put the casing onto your sausage stuffer and tie off the casing once the meat is in it.
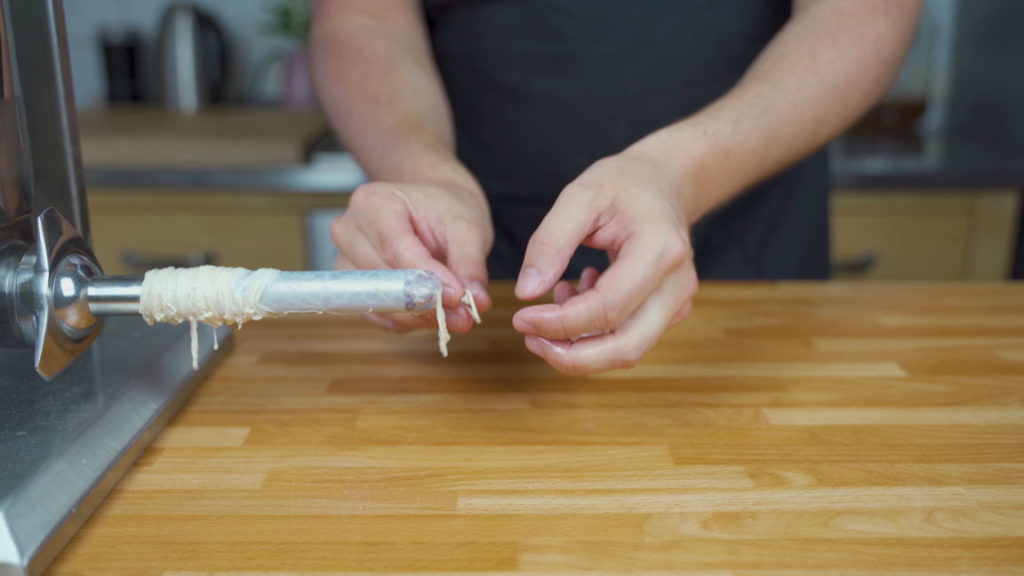
7. Fill the mass into the casings. Make sure that there is trapped as little air as possible.
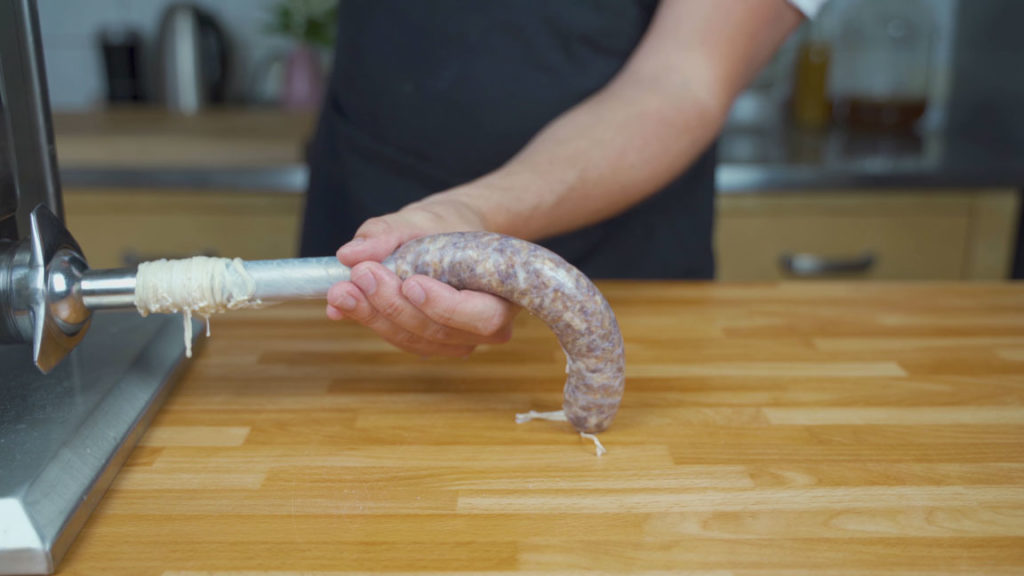
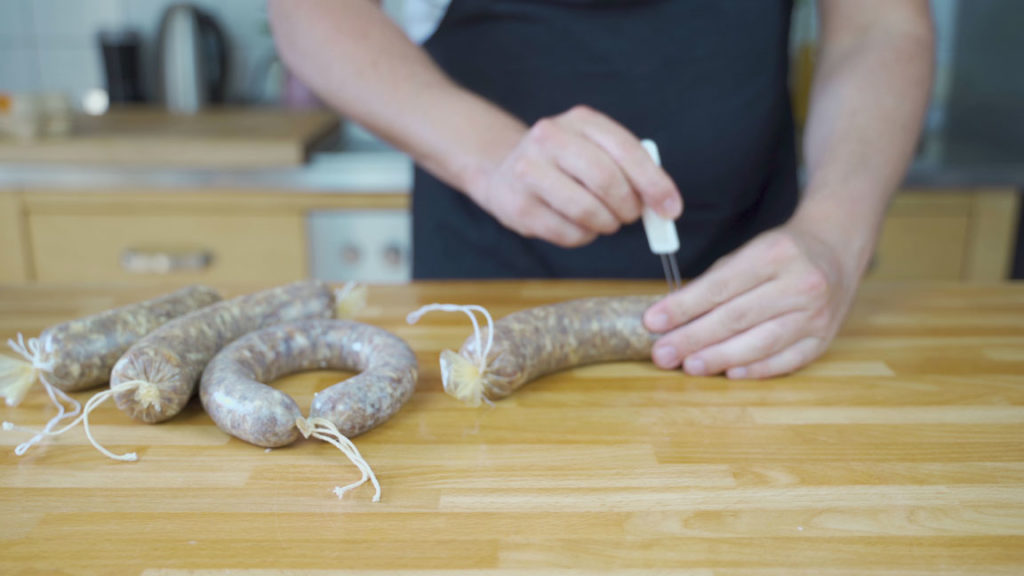
8. Tie off the other end with a butchers twine as well.

9. Take a needle and prick the sausage to open any air holes.
10. Now it is time for the fermentation process. I have added a detailed tutorial below. The short version that works for me at home: Let the salami hang at room temperature (20 °C / 68 °F) and high humidity (>95%) for 24 hours. You can spray the salami with water every now and then to keep the humidity as high as possible.

11. After 24 hours you will see that the color has changed. You can now hang them in any cool place. The humidity should not be less than 75% and the temperature not more than 18 C° (<64 °F). In my case it was the cellar. Hang a damp cloth nearby for the first two days and / or moisten from time to time. I let them mature for about 3 weeks. This step is also explained in detail below.
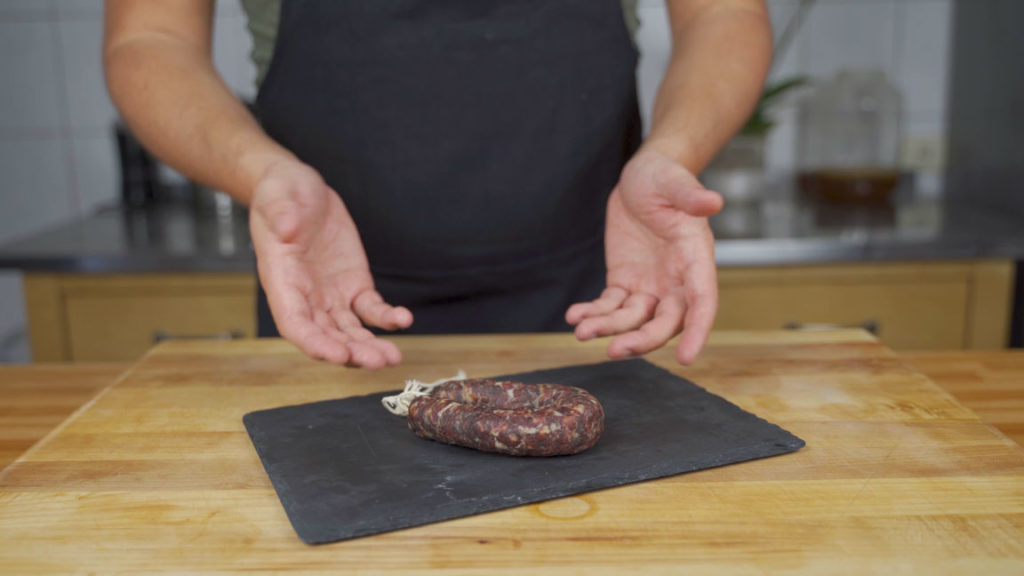
12. Your Salami is ready. If you want it even harder, you can let it dry even longer.
Book recommendation: The Full Guide On Making Sausages Easily At Home – Step-by-step instructions & 37 delicious recipes

Making Salami at home – The process explained in detail
Making salami is a combination of your skill and the invisible magic of bacteria.
Unfortunately, there are both “good” and “bad” bacteria….
The friendly bacteria work for you, the bad ones try to wreak havoc in your sausage.
That’s why it’s your job to control the process inside the sausage. Until you end up with a delicious salami.
To protect your sausage from the bad bacteria, your two best weapons are to increase the meat acidity (lowering the pH) and lower the water content (Aw).
So you need to create conditions that:
- Prevent the growth of dangerous bacteria
- Encourage the good bacteria to grow and work.
- And that’s what you do in the maturing process….
During this time your salami should lose about 25-30% of its weight and find certain conditions:
The right humidity and maturing temperature
Humidity and temperature are the most important factors in salami production.
At the same time, this is where you can go wrong the most.
If the humidity is too high, your salami can mold. On the other hand, if it’s too low, your sausage can dry too quickly at the edge and the inside can’t dry properly -> the salami will rot from the inside out.
If you make the salami with curing salt and / or starter cultures, the following temperatures and humidity levels are recommended:
| Day | Temperature C | Temperature F | Relative humidity |
| 1 | 20° C | 68 F | 95 % |
| 2 | 20° C | 68 F | 95 % |
| 3 | 20° C | 68 F | 93 % |
| 4 | 18° C | 64.4 F | 93 % |
| 5 | 18° C | 64.4 F | 90 % |
| 6 | 18° C | 64.4 F | 90 % |
| 7 | 18° C | 64.4 F | 88 % |
| 8 | 18° C | 64.4 F | 88 % |
| 9 | 18° C | 64.4 F | 85 % |
| 10 | 18° C | 64.4 F | 85 % |
| 11 | 18° C | 64.4 F | 80 % |
| 12 | 18° C | 64.4 F | 80 % |
Smaller calibers should be ready for consumption after 7 days.
If you use a larger caliber, then the salami can be mostly eaten from day 12 or further dried under 15 °C and 75% humidity.
What you do depends on your taste and preferences of consistency.
Of course, these temperatures can only be maintained in a climate chamber or a Dry Ager.
For small caliber (up to 30), the following process has worked well FOR ME:
Let salami hang at room temperature for 24h, moistening again and again with a spray bottle of water.
From the second day in the cellar (16 ° C and 75% humidity). The first 2 days still hang a damp cloth nearby and moisten from time to time.
After that let it dry out for another 5 days.
IMPORTANT: You must know what conditions your cellar has and how to best create these conditions. Dangerous bacteria can form during salami production and are not to be trifled with!
Another way to control the humidity is the “end of sausage” check:
- If the end is dry it means humidity too low
- If it is supple it means air humidity correct
- If the tip is dripping means humidity too high
In any case, start with narrow calibers (e.g. pork casing 28/30). When you have successfully made salami with them, you can switch to larger ones.
Smoking Salami – How does that work?
Of course, you can smoke your salami if you want. To be precise, the salami is cold-smoked. For this it is important that you use either natural casings or smokeable artificial casings.
Smoking does NOT replace the start of the maturing process.
The salami must be hung at room temperate and should mature between 5 and 7 days (depending on the caliber) before the smoking process.
After that you can cold smoke it for example 3 times for 8 hours.
It is important that the salami can rest for 24 hours between the cold smoking repetitions. This way you will get an optimal smoke distribution and a great end product.
After smoking, you can leave your salami to ripen for a few days or weeks (depending on the caliber).
Storing your Salami – This is how you do it
After the maturing process, you store your salami in the best case between 10 and 15 °C and about 75% humidity.
If the humidity is lower, the sausage loses more water and becomes firmer. If it is too high, the molds are happy and cause your sausage to spoil.
You can also store the salami vacuum packed or in an airtight container in the refrigerator for several months.
Reader tip: Dirk, a reader of my blog has written to me that he has had very good experiences, vacuumed the pieces (size adjusted to 1 week consumption) and frozen.
Quote: Tastes great and I feel taste again more intense.
If you store the salami too long in the air, it can taste rancid after a while. This is due to the oxidation of the fat, which can happen quickly.
Starter cultures – What is it and do you need it?
Starter cultures are small microorganisms added during the production of salami.
They are an excellent thing because, especially in the critical initial phase, they ensure the slow acidification of the sausage (reduction pH) and thus suppress the undesirable bad bacteria.
They are, so to speak, the good bacteria in abundance.
This way it will be easier to make your salami, as ripening defects and the possibility of your sausage spoiling will be drastically reduced.
There are different starter cultures, with and without accelerators and different additives.
As a hobby sausage maker, you are quite well served with Bactoferment 61 or a similar one without additives.
My recipe can also be supplemented with starter cultures if you want.
If you use starter cultures, please follow the manufacturer’s instructions.
Sometimes no sugar may be added or a smaller amount of salt is needed because it is already included.
Tips & Tricks for your homemade salami
As mentioned several times now, salami is not the easiest sausage to make yourself. Meanwhile, many butchers even buy them, because the production requires a lot of time and patience. In addition, the risk is very high that something goes wrong.
To make it as easy as possible for you, here are 3 tips for you:
The right choice of meat
The best meat for making salami is meat from older (over 1 year) and heavier animals. Therefore, I advise you not to use meat from factory farming.
This is because the meat from fast-fattened pigs has a very high water content. This can affect the maturation, and you are sabotaging yourself.
The same applies to the fat. It should be as solid as possible (pork backfat) and well hung.
Pay attention to hygiene
Since salami is a cured sausage, it is even more important that you work hygienically.
Maintain the correct temperatures. Control the humidity. Follow the steps and make sure both your work utensils and hands are clean.
If you don’t, it’s easy for your salami to go moldy and all the effort will be wasted and the meat will have to be thrown away.
Start with a small caliber
I’ve mentioned it before above but use smaller caliber (e.g. pork casing 28/30) to start.
My experience is that the thinner the salami, the less can go wrong in the beginning.
Once you’ve made a few salamis and understand the curing process, you can venture into thicker salamis.
3 additional Salami recipes
The preparation works in the same way as in the basic recipe. Starter culture can be added to all recipes according to the manufacturer’s instructions.
Paprika-Garlic Salami
Ingredients per 1 kg:
- 800 g pork shoulder
- 200 g pork back fat
Seasoning per kg of meat:
- 22.5 g salt
- 2.5 g Cure #2 (#1 also works)
- 30 g paprika powder
- 5 g black pepper
- 3 g dextrose / sugar
- 10 g fresh garlic (minced)
Tuscan Finocchiona (Fennel Salami)
Ingredients per 1 kg:
- 850 g pork shoulder
- 150 g pork back fat
Seasoning per kg of meat:
- 22.5 g salt
- 2.5 g Cure #2 (#1 also works)
- 3 g dextrose / sugar
- 2.8 g fennel seeds
- 2 g white pepper
- 1.5 g black pepper
- 0.9 g garlic powder
- 15 ml Chianti (or similar)
Venison Salami with a spicy kick
Ingredients per 1 kg:
- 600 g game meat
- 250 g pork loin fat
- 150 g lean pork meat
Seasoning per kg of meat:
- 850 g pork shoulder
- 150 g pork back fat
Seasoning per KG of meat:
- 22.5 g salt
- 2.5 g Cure #2 (#1 also works)
- 3 g dextrose / sugar
- 3 g chili flakes
- 2.5 g garlic powder
- 1 g black pepper
Questions & Answers about making Salami yourself
How can you tell that the salami is bad?
Your salami is spoiled if it is greasy and has a sour smell. Also, if greenish mold is visible, it is beyond saving.
What is the shelf life of salami?
In one piece, your salami will keep for several months if stored in a cool place. When sliced, you can eat it for about 2 weeks.
Can I make salami myself without a meat grinder?
You would like to make your own salami, but you don’t have a meat grinder at home, and you don’t want to buy one?
Then I have 2 variants how you can make salami without a meat grinder.
- Ask your trusted butcher if he could grind the ingredients for you.
- Do all the steps according to the instructions until you get to the point where the meat has to go into the meat grinder. Here you simply cut your meat into very small pieces. This takes longer, but it also works.
My salami is moldy, what can I do?
If you see that your salami is moldy, you can wash it with a little vinegar water. You can repeat this process more often if necessary.
The more the salami matures and thus dries, the less likely new mold will appear.
IMPORTANT: This only applies to white mold to a small degree. If you are unsure, better throw your salami away and don’t experiment.
Can I make my own salami without cure and starter cultures?
Yes in general, but in all likelihood you can’t.
If you do not have the necessary knowledge and equipment you should never do it without cure otherwise your salami will spoil due to the rapid growth of bad bacteria.
Production without cure is extremely difficult. When someone makes salami without it, perfect conditions are created, which is almost impossible to do at home without perfect equipment.
My salami has a dry outer ring, what can I do?
If you don’t have a curing chamber, it can quickly happen that the salami dries out at the edge quite quickly and forms an unwanted dry ring.
There are two ways to prevent this:
- Rub the salami with salt water (approx. 30 g / l). This will soften the edge again.
- Vacuum the salami for a week. This draws moisture from the inside to the outside and the edge becomes softer.
I hope this article helped you to understand how you can make your own Salami at home. Leave me a comment and let me know if you have any questions.
YOu say to ferment the salami (Step 10) but you do not add any starter culture to the meat.
How does that work ?
Hey Peter,
the culture is just a highly concentrated mixture. If you go the route without the starter natural fermentation will happen. It is similiar to gathering natural yeast. However, as I explained in the article you could also add starter culture. Till now, I made all my Salami, Chorizo etc. without it and it works just fine. Will experiment with it in the future for my Cured Sausages book.
Cheers,
Daniel
What will happen if you used to much cure in your sausages?? As much as double the recipe calls for ??
Hey Terry,
The amount of nitrite is not something to be joked with. I actually do not know what will happen but I strongly advise you to stick with the amount in the recipe. Too much is dangerous.
Cheers
Daniel
Perhaps this has been asked and answered already and I apologize if it has. But how can you tell if your salami has gone bad during the curing? I want to try this but am scared of poisoning the family.
If there are holes in it for example -> throw it away. If there is green mold -> Throw it away. If it smells off -> Throw it away. Otherwise if you use the right ratios and stick to the process it should be fine. Start with thinner calibers and go up from there.