In this post I show you how you can make lardo yourself. With little effort you achieve a super tasty result.
Lardo is actually nothing more than cured fat. You can eat it sliced wafer-thin on bread (Crostini al Lardo) or prepare fantastic pasta dishes (Ziti lardiati) with it. The highlight is that the preparation is super simple and just takes some waiting time.
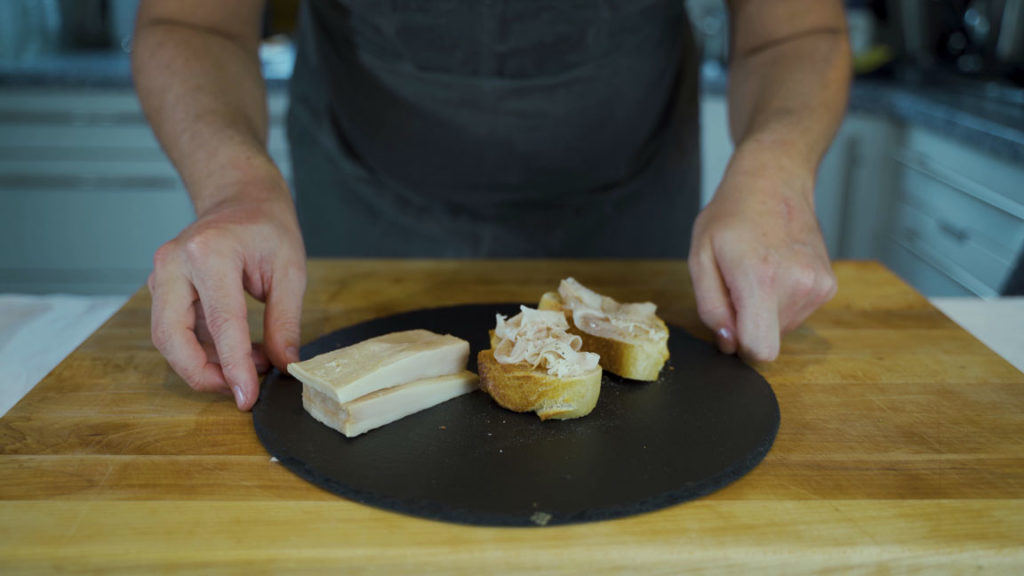
My tip: toast a piece of bread and slice the largo paper-thin and enjoy it together with salt and pepper. Super delicious as the fat already melts easily on the bread.
The recipe is from my ham book “Make Dry-Cured & Cooked Ham Easily At Home Step-By-Step Instructions & 28 Delicious Recipes”.
Here you can find the complete Lardo recipe as a video or to read through.
Have fun and good luck!
Table of Contents
Making your own Lardo – What do you need?
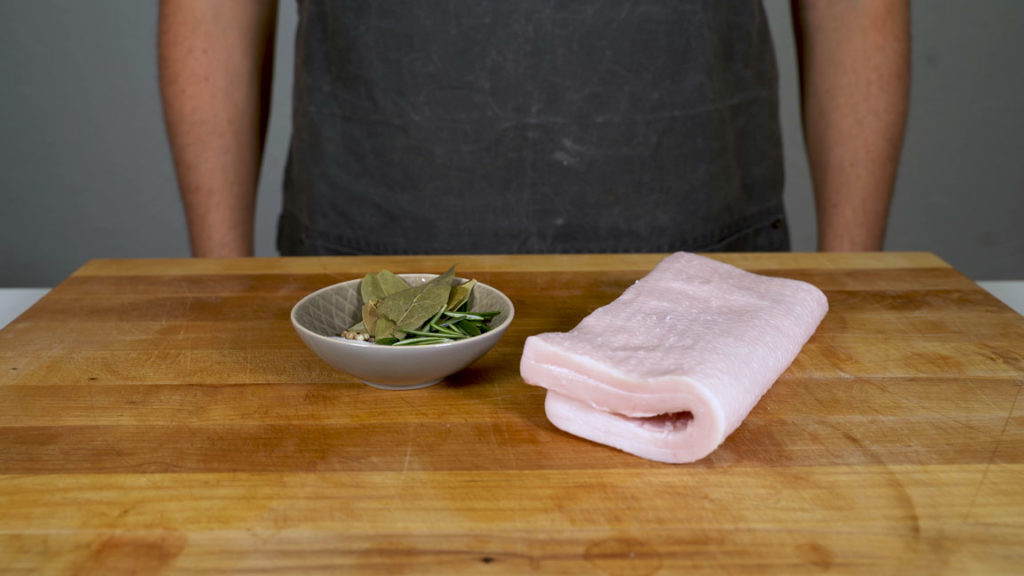
Ingredients for 1 kg Lardo
- 1 kg of pork backfat
Spices for 1 kg of meat:
- 32.5 g salt
- 2.5 g Cure #1
- 5 g black pepper
- 4 g fresh rosemary
- 2 g white pepper
- 2 bay leaves
Equipment for making Lardo
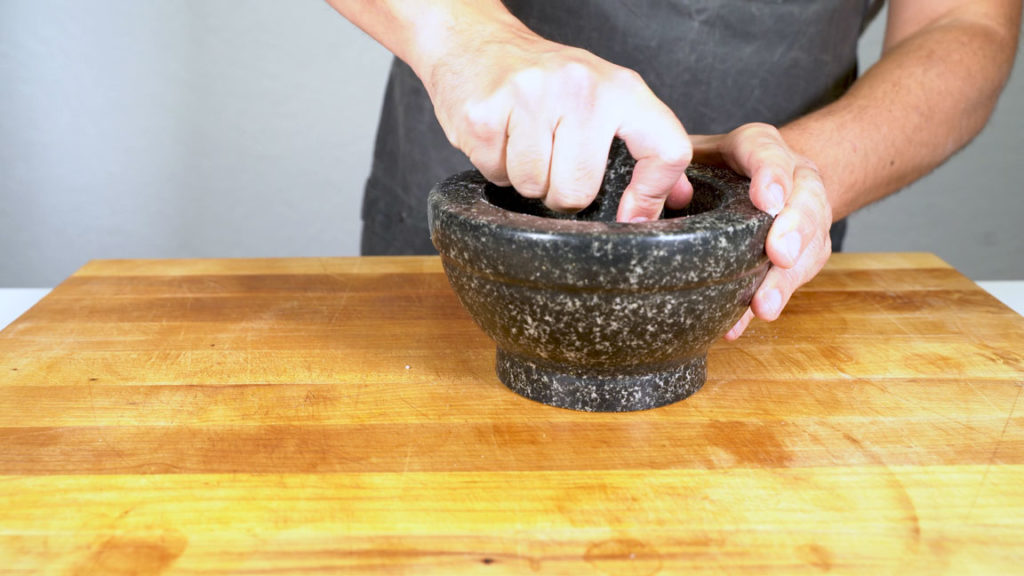
Spice grinder / mortar
To grind your spices, it is best to use a spice mill. Alternatively, a mortar is also suitable. Or you can use already ground spices. I recommend to grind them yourself.
Make Lardo yourself- Step-By-Step Instructions
1. Grind the spices and salt in a mortar. It doesn’t have to be super fine, just reasonably well mixed.
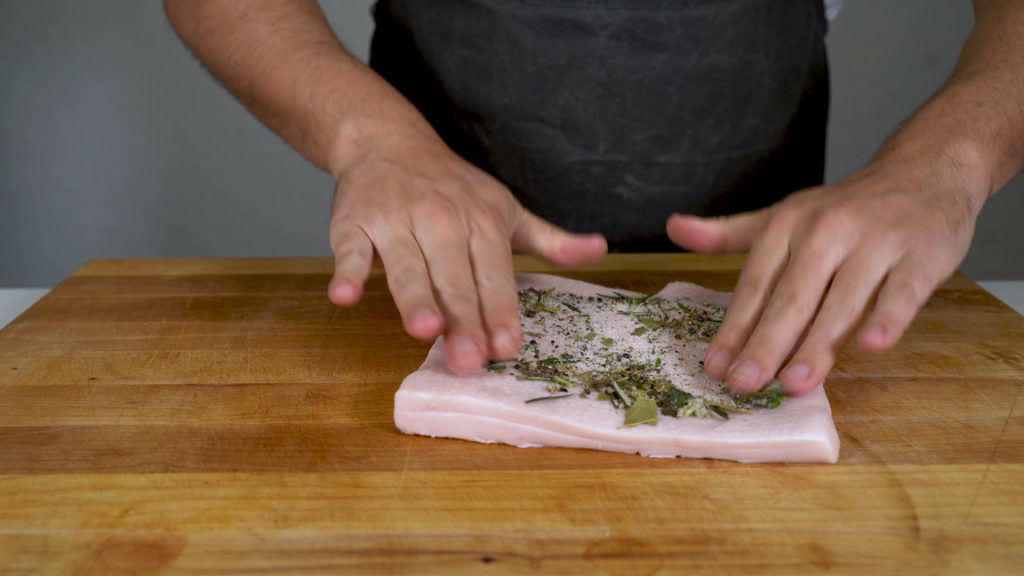
2. Rub the spices evenly onto the pork backfat. It is important that the fat is completely covered.
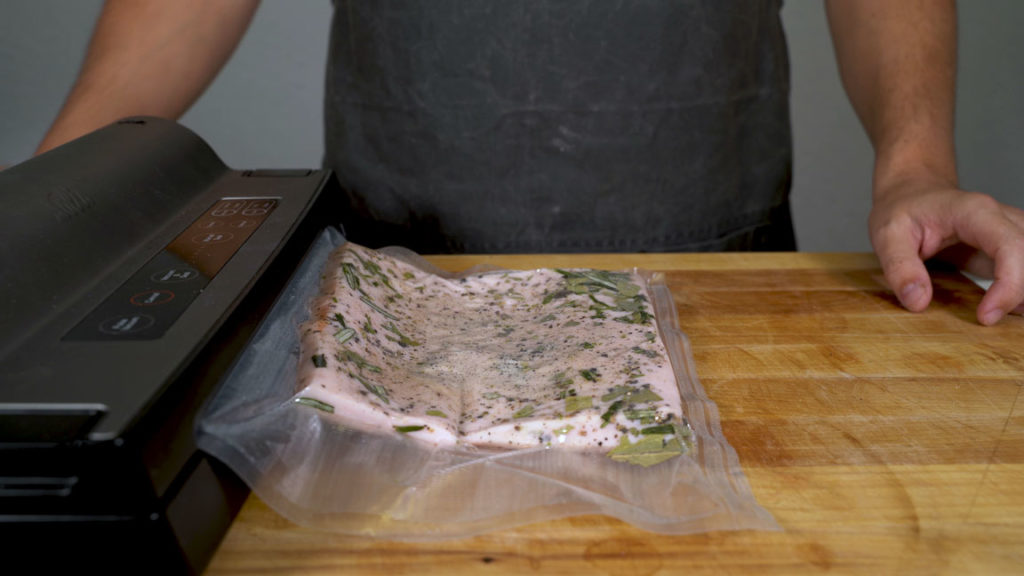
3. Put the fat into a vacuum bag together with the remaining salt, cure and spices. Important: You really have to put all the weighed spice, salt and cure into the bag.
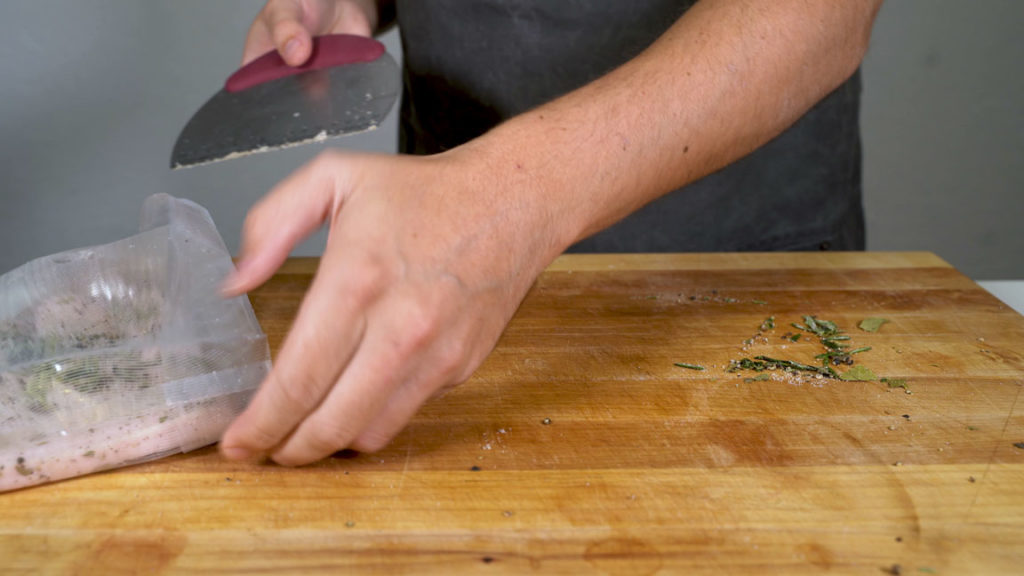
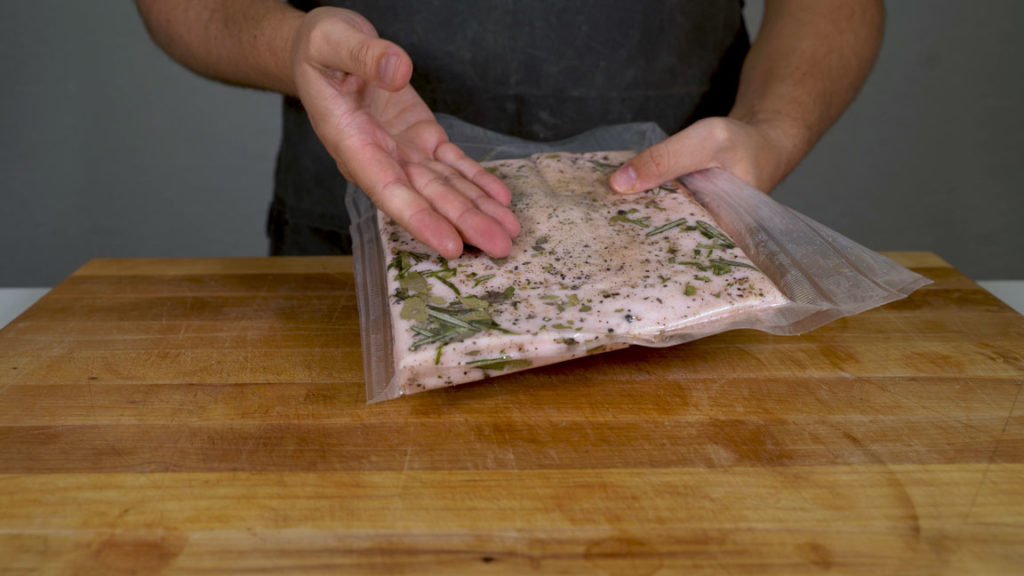
4. Vacuum the fat and write the date on the bag.
5. Put the bag in the refrigerator for at least 3 months (fat about 1.5 cm thick). If you want to make a thicker piece, you should also increase the duration. For 3-4 cm thick pieces about 6 months.
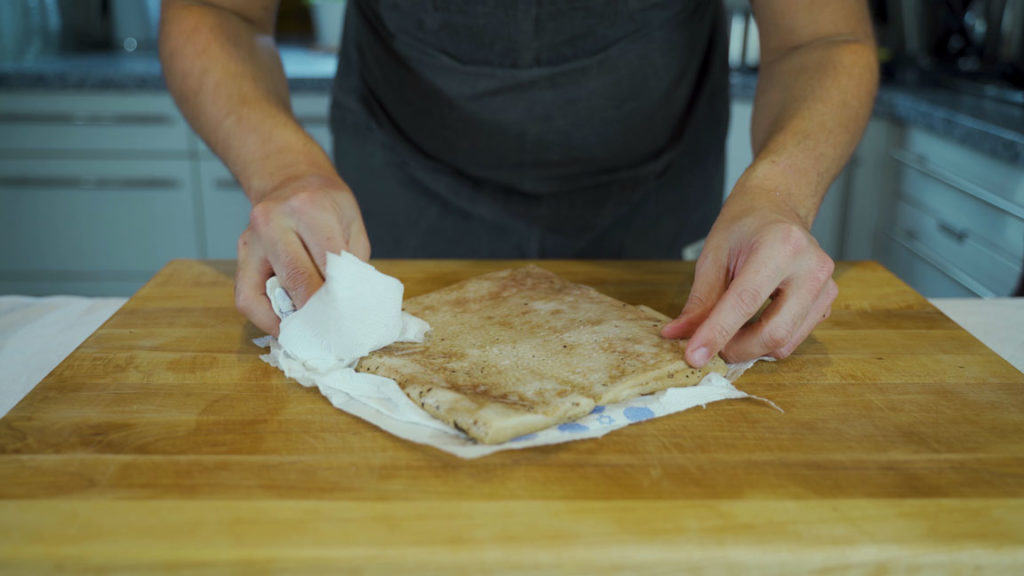
6. Take the lardo out of the bag. You will notice that the texture has changed and it has taken on a wonderful smell.
7. You can now wash the spices under cold running water. You can then dry it with a kitchen towel. Optional: If you don’t like the discoloration from the spices, you can also remove a thin layer with a knife. Afterwards, you have a great-looking piece of lardo.
8. Your lardo is ready. As you can see, you can portion the pieces and then cut them crosswise. This way you get nice wide slices despite the thin starting pieces. Enjoy them sliced wafer-thin on a freshly toasted baguette with a little salt and pepper.
What is the shelf life of Lardo?
The lardo has a shelf life of about 4 months.
Hi Daniel that is a nice simple recipe that I want to try. As I live in Phuket Thailand Pork Back Fat is readily available as Pork is a staple of the Thai diet. I will put that on my shopping list for this week and get it in my curing chamber for later in the year if they have nice thick Fat that is. I make a lot of Charcuterie and fresh Sausage but never made Lardo.