In this post I’ll show you how to make dry cured ham yourself. Cured ham is incredibly versatile and delicious.
Making ham is a challenge because you’re working with raw meat. But with the right help, you’ll get it done no problem.
To help you make the best ham possible, I’ve put together all the necessary information for ham making in this article.
This article is an excerpt of my dry cured ham book. If you want to know everything about ham production + 28 other ham recipes, then definetely check out the book.
Of course, you will also find a few ham recipes and an explanatory video.
Have fun and good luck!
Table of Contents
Making your own dry cured ham – What do you need?
INGREDIENTS PER 1 KG HAM
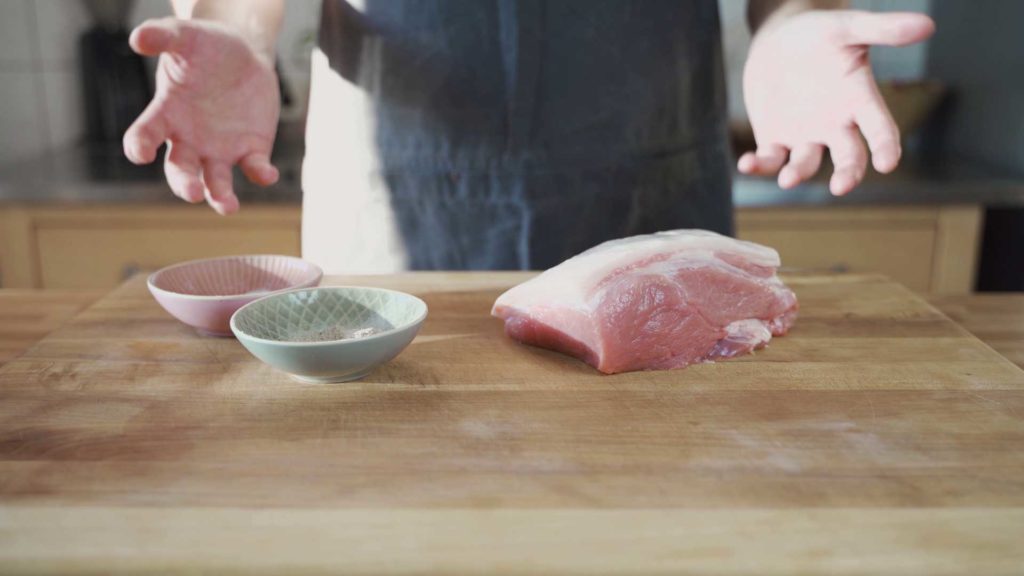
I recommend that you start with pieces between 500 g and 750 g at the beginning.
This has the advantage that if something should go wrong, you do not have to throw away so much. Also, drying and curing is much easier with smaller pieces.
The piece for your first ham can come from the leg of the pig. Preferably with fat and rind.
SPICES PER KG OF MEAT
- 27.5 g salt
- 2.5 g Cure #1
- 2 g cane sugar
- 2 g dextrose
- 2 g black pepper
- 1 g coriander
- 1 g garlic powder
- 1 g allspice
Equipment for making Ham
Spice grinder/ mortar:
Freshly ground spices taste best. But of course, you can also use ground ones. It is best to use a spice grinder. Alternatively, you can use a mortar. You just need to take care, that the spices are completely ground.
For the stress-free “curing in vacuum” method you need a vacuumizer. If you don’t have one yet, you can check out my recommendation here.
Alternative: “Real dry curing” doesn’t require a vacuum sealer, read my article on the subject of curing.
Place to dry and mature the ham
To age the ham, you need an environment where both humidity and temperature are relatively constant. There are several possibilities for this. I have already matured cured hams in the fridge or cellar without any problems.
Optional: If you want to be on the safe side, then a ripening cabinet is the best choice. My recommendation: Dry Ager DX 500
Smoker (optional)
You need the smoker if you want to smoke your ham.
Cold smoke generator and smoking flour (optional)
The cold smoke generator burns for about 12 hours. This makes sure you do not have to constantly refill the smoking flour.
Making Ham- Step-By-Step Instructions
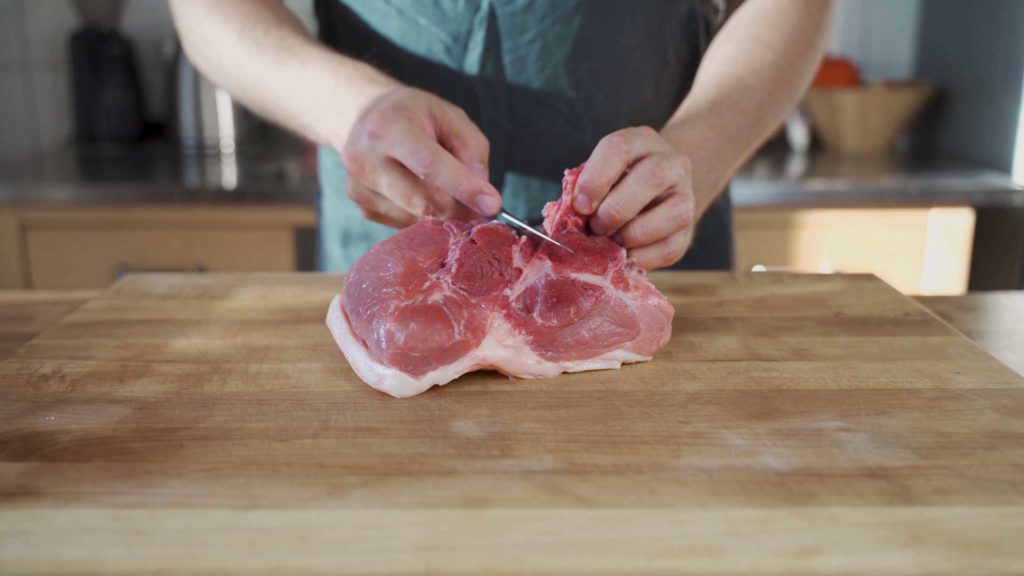
1. Take your piece of meat and clean it from all sinews, fibers, silver skins. Also make sure there are no large visible pockets. The meat should be clean and without any nicks.
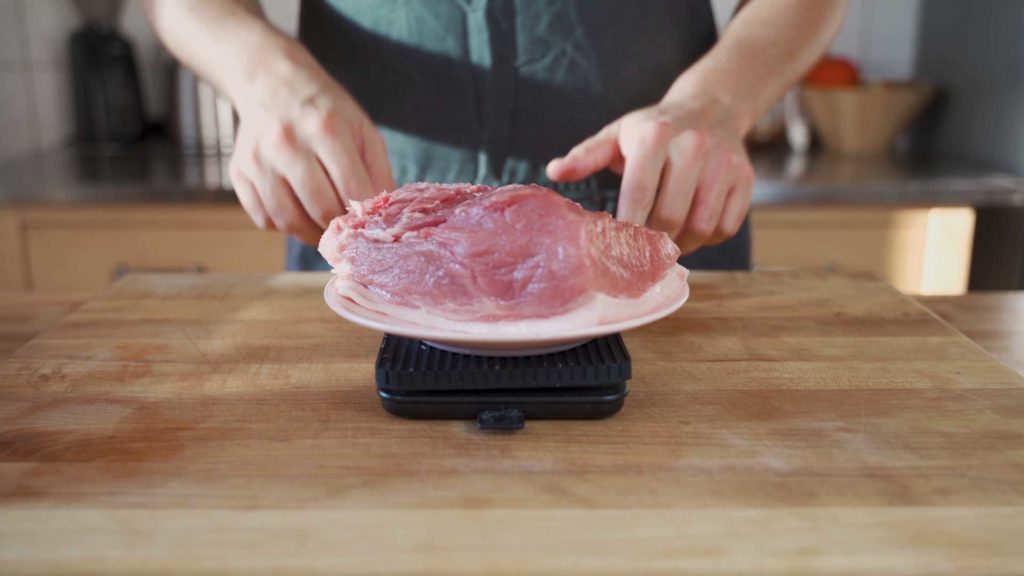
2. Weigh the piece of meat and measure the amount of Cure, salt and spices accordingly.
3. Massage the meat with the spice mixture. Make sure that all sides are nicely covered.
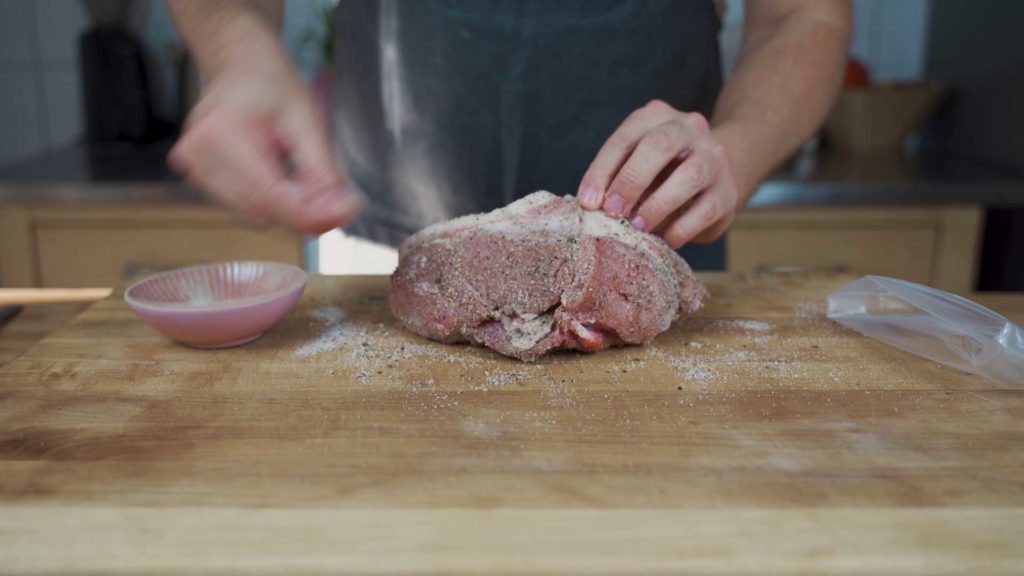
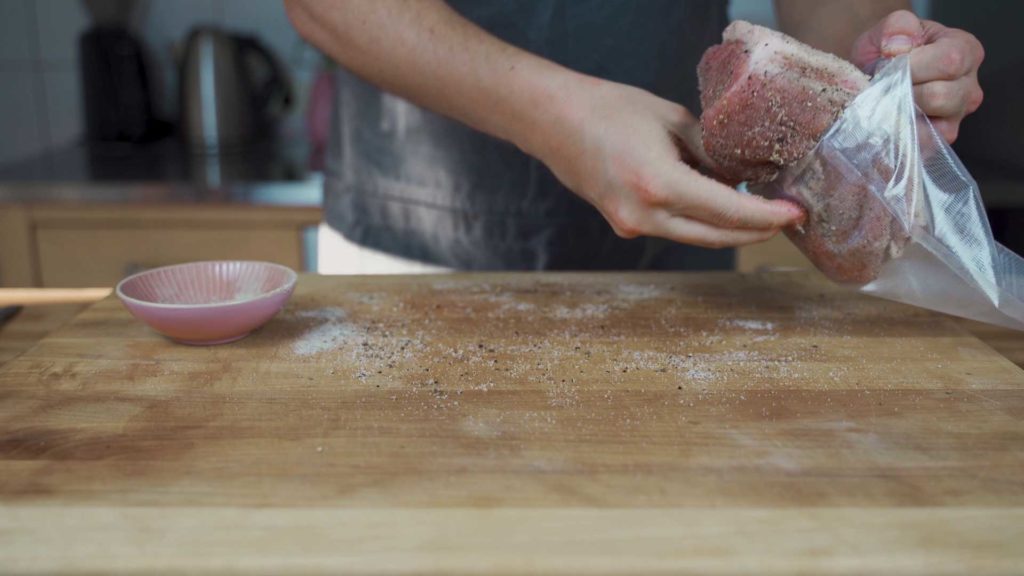
4. Now put the meat into a vacuum bag.
Important: Put any leftover spice mixture that is still in the bowl / on the board into the vacuum bag. Since we have weighed the spices and the salt, everything should really be in the bag.
5. Then you can vacuum the meat.
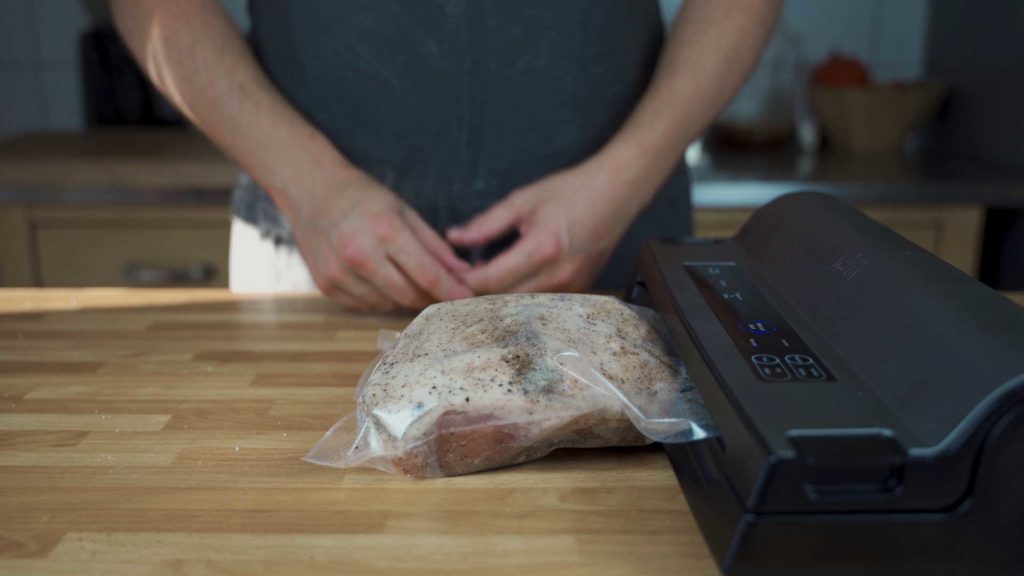
6. Now the meat must be cured in the refrigerator. Put it in the fridge for 10.5 days and turn it once a day.
The 7 days are calculated from the following curing time: Per cm meat thickness approx. 1.5 days curing. A piece in this weight category is about 7 cm thick. -> 7 * 1.5 = 10.5 days. With this, you are on the safe side.
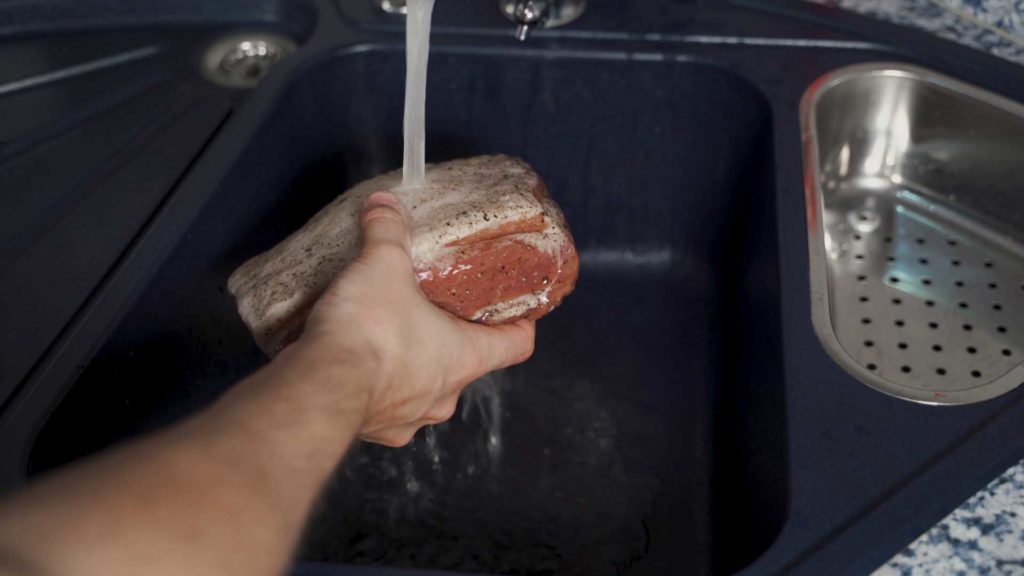
7. After the curing is done you rinse the meat with cold water. The goal is to wash the spices from the meat.
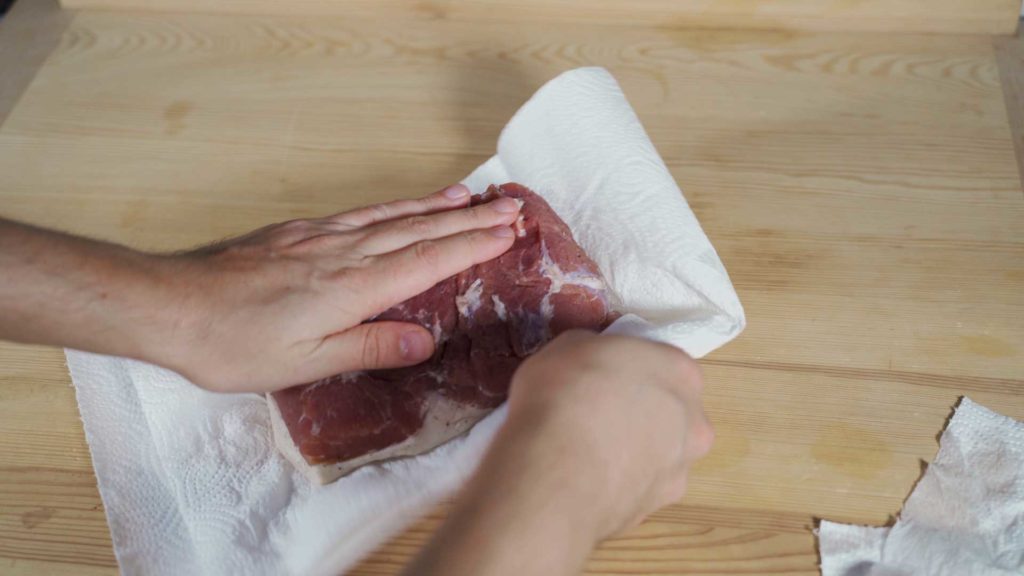
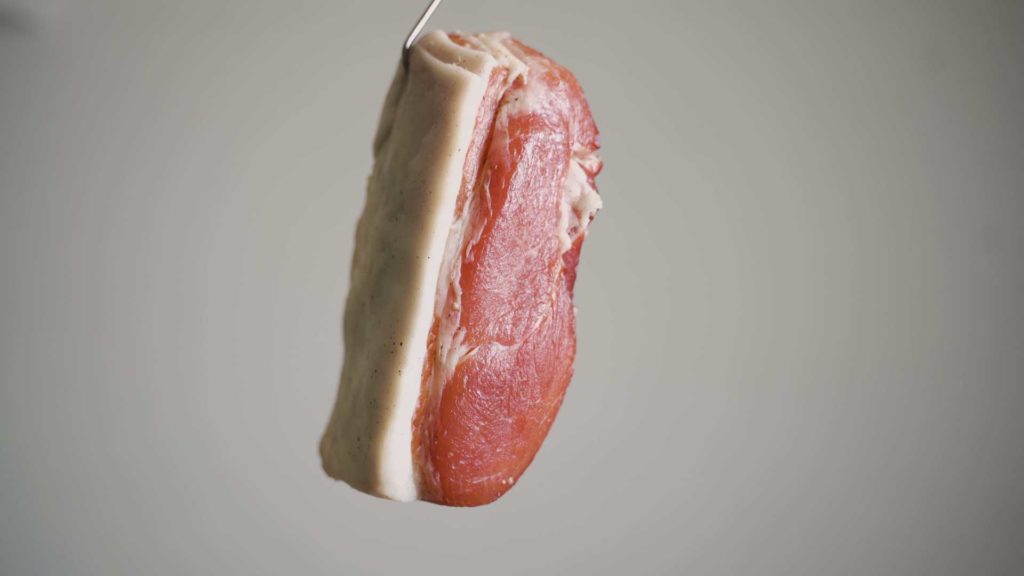
8. Pat the meat dry with a kitchen towel. Then insert a hook into the cured piece of meat. This way you can hang it up better. Alternatively, you can also tie the ham with kitchen twine and hang it up.
9. Leave the cured ham in a cool cellar or on a grid in the refrigerator for about 3.5 days to equalize.
The “equalization” time is calculated based on the curing time. 7 days curing divided by 2 = 3.5, so if you cure it longer, the time will adjust.
Note: With the Equilibrium Curing process (which we used) this step is not for salt equalization but for an initial drying out so we can cold smoke the meat.
10. OPTIONAL: You can now hang the ham in the smoker and cold smoke it for 5 passes*. The temperature in the smoker should ideally be between 15 and 20 degrees Celsius (59 – 68 Fahrenheit).
*One pass means 12 hours of smoke and 12 hours of resting without smoke.
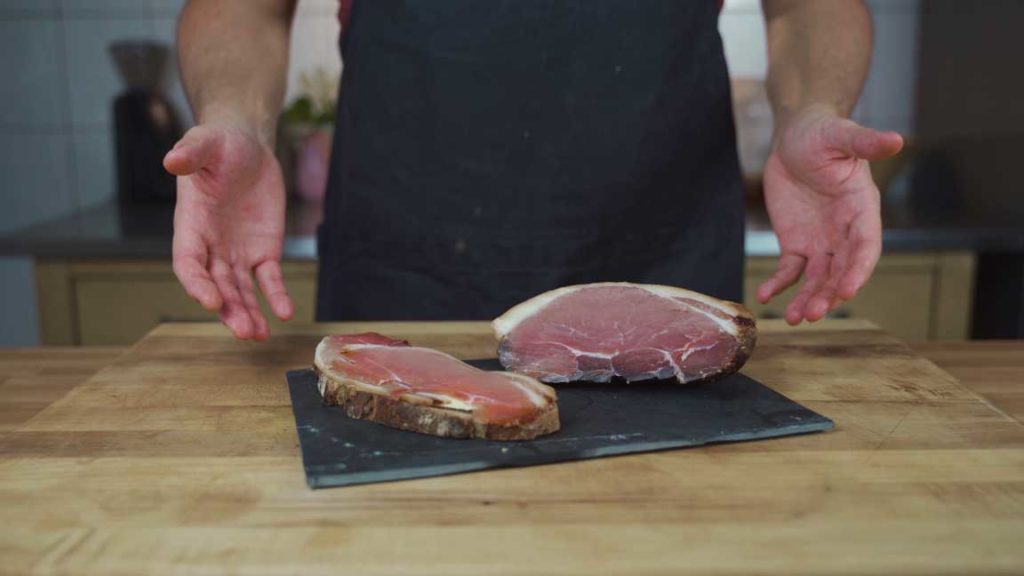
11. In theory your ham is now ready 😄. You can eat it directly. My recommendation is to let it ripen a bit more.
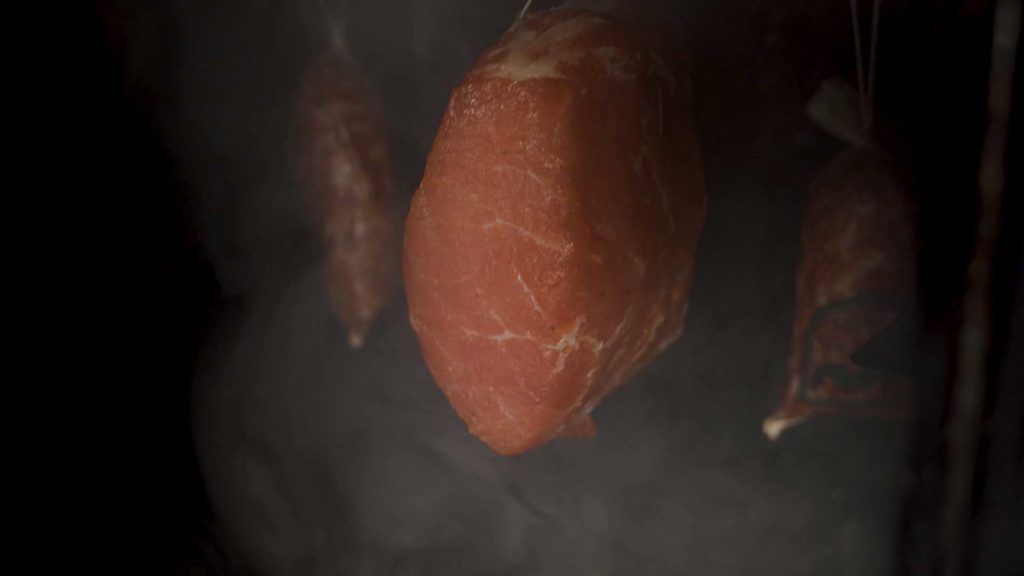
12. Let the ham mature for a few weeks in a cool cellar. Depending on how firm you want it, you can vary the time.
Book recommendation: The Full Guide On Making Dry Cured & Cooked Ham Easily At Home – Step-by-step instructions & 28 delicious recipes

Making ham yourself – The process explained in detail
With the production of raw ham you are dealing with the preservation of raw meat. Therefore, there are a few special points that need to be considered.
As you probably know, untreated raw meat will become moldy after some time even in the refrigerator. This is something we want to prevent at all costs.
More specifically, if not handled properly, bacteria will build up and in the worst-case scenario (botulism) can even be life-threatening.
But before you start thinking that we are fighting bacteria, I have to tell you that they can also help us in the production of ham.
The right bacteria make the meat tender and provide an intense good taste.
So what we actually want to do is contain UNWANTED bacteria and promote wanted bacteria.
The core rules to achieve this are:
- Working cleanly to eliminate unwanted bacterial contamination.
- Limit the growth of bacteria through the use of salt
- Slow the growth of bacteria by cooling
- Kill unwanted bacteria with nitrite
- Prevent long-term growth by drying out the meat
With these five rules, we contain the undesirable bacteria as best we can.
In addition, we try to encourage good bacteria by giving them something to eat. And that is sugar / dextrose.
The individual steps to an excellent dry cured ham are the following…
Step #0: Paring
This step is rarely, if ever, highlighted in many recipes, but it’s an important foundation for avoiding mishandling and getting a respectable ham.
When you order cuts of meat from your butcher, they often still have silver skins and tendons on them that you need to remove before processing.
The reason for this is obvious: no one wants to bite into something solid and unappetizing when they eat it later. The best thing to do is to take a short sharp knife and carefully remove the disturbing factors.
In addition to the silverskins and tendons, the piece of meat may still have hanging shreds of meat or pockets of meat.
Remove these with a knife as well. In the end, the piece of meat should look as smooth and uniform as possible.
If you do not do this, bacteria can multiply here due to the larger surface and hidden pockets and lead to spoilage.
Make sure you don’t accidentally cut into the meat yourself and create more surface area.
Step #1: Curing
Curing is a necessary step for all types of hams and cannot be skipped.
There are several methods of production. I will cover here the ones that, I think, make the most sense for home ham makers.
First, a general summary of why curing is necessary and what happens during the process:
In the case of cured ham, you are working with raw meat and have to, try to protect it as much as possible from spoilage.
Salt and the reduction of the water content of the piece of meat helps us to do this.
The meat is cured with salt, sugar and spices. The salt extracts liquid from the piece of meat. At the same time, it penetrates into the meat together with the other flavors. This process is called osmosis.
The longer the meat is cured, the more evenly the salt is distributed. Patience is therefore required here.
For cured ham, dry curing methods are used for this purpose….
- Real dry curing
- Dry curing in own brine
More information on curing can be found in this post or in my ham book.
You can calculate the minimum duration of curing in own brine with the following formula:
Meat thickness in cm * 1.5 days = minimum curing time.
Unlike cured ham, extracting liquid from cooked ham is not a priority. On the contrary, to produce a juicy ham, we need the liquid in the meat. That is why a wet curing process is used here. However, the process of osmosis remains the same here.
Step #2: Equalization
Once the meat is done curing, you can rinse it under cold water.
The next step is the so-called”Eualization Phase”. For this, you hang it in a cool room between 10 and 20 °C (50 – 68 Fahrenheit) for a certain time.
No matter how far the distribution of the salt has progressed, if you want to smoke, then your meat must first dry.
The goal of this phase is to reduce the water content of the meat at low temperatures, thus eliminating harmful germs.
If you cure your meat with the dry curing method and the curing time was long enough, you can skip this step.
I know people who leave the ham in the vacuum for twice the time or longer and then don’t let anything “equalize”, just dry it off and smoke it right away. It can’t do any harm, because the salt content is exactly measured and more can’t go over into the meat.
The duration of this phase is about half of the minimum curing time.
Step #3: Smoking (Optional)
I am often asked if you can make your own ham without a smoker. As you’ve probably picked up by now, the answer here is: Yes definitely.
However, smoking does have some advantages….
Smoking gives you…
- Increased shelf life due to preservation
- Smoke aroma and thus changed taste
- A great color due to the smoke
The preservation in the smoke happens through germicidal substances contained in the smoke and a “protective layer” which is formed thereby and prevents the penetration of germs. It is important to say here that an increased shelf life only occurs with cold smoking (cured ham).
The taste is also influenced by the smoke. This can be perceived positively or negatively, depending on your preferences.
The deposition of tar wood, which occurs during smoking, leads to the golden-yellow color change on the surface.
The various smoking methods differ in their temperature ranges and in the equipment needed.
You can find more information on cold smoking in this post or in my ham book. Hot smoking variations for cooked ham are also explained there.
Step #4: Mature
The last step is drying or maturing. Theoretically, the ham is edible right after curing, but it still contains a lot of moisture.
This is not only bad for cutting fine slices, but also takes some getting used to in terms of consistency.
The moisture is also the reason why there is also the step of drying before smoking. Otherwise, your ham would not absorb any smoke at all.
There are often values floating around that your ham must have lost 30% or be aged a minimum amount of time.
This is partly true but not the whole truth.
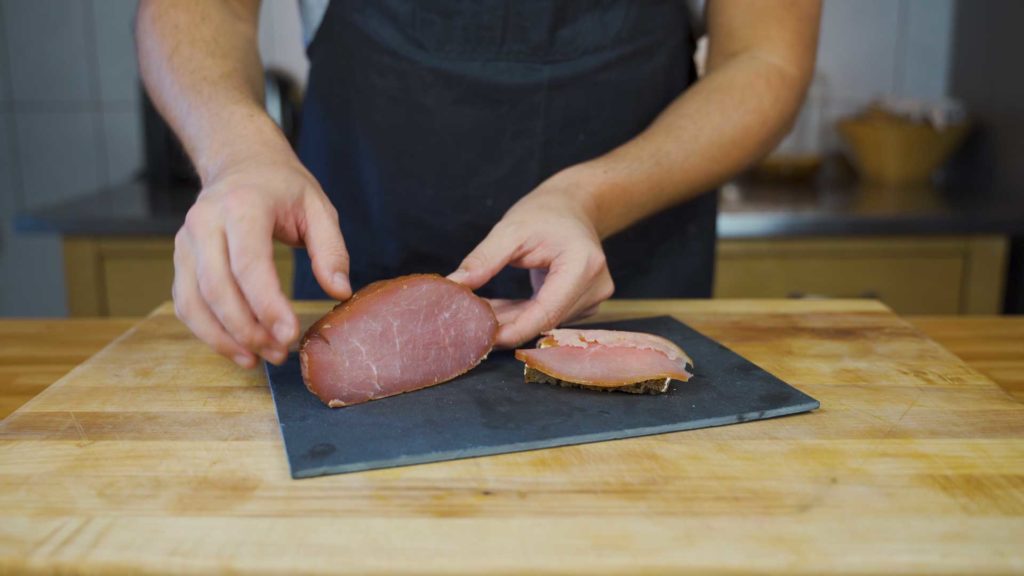
A delicate Lachsschinken, for example, tastes much better to me personally when it has more moisture. That means I let it dry / ripen for a maximum of a week and then cut it.
The the opposite of this would be an Iberico ham that has been aged for three years.
Between these two extremes, there are two variables you need to be aware of, because as I described at the beginning, during this time the ham is not only drying, but also maturing.
During the ripening process, the flavor specific to the ham is formed. The meat’s own enzymes and microorganisms break down the meat protein, fats and sugars and build up special aromas.
The longer you let your ham mature, the tastier BUT also drier it becomes.
The shorter you let your ham age, the juicier and also milder it will be.
As with most things, it is again a complete matter of taste.
The only important thing is that the maximum shelf life is reached at about 30% weight loss. After that, you can store your ham for months or years. If the ham is stored too moist, problems can occur.
Tips & tricks for making cured ham yourself
As mentioned several times now, ham making is simple but not easy. Meanwhile, many butchers even buy them, because the production requires a lot of time and patience.
To enable you to make as good as it goes, I have 3 tips for you:
The right choice of meat
The meat from older (over 1 year) and heavier animals is best suited for ham production. Therefore, I advise you not to use meat from factory farming.
This is because the meat from fast-fattened pigs has a very high water content. This can affect the ripening process and you will be putting yourself in a non optimal starting position.
Pay attention to hygiene
Since cured ham is a raw product, it’s incredibly important that you work hygienically.
Maintain the right temperatures. Control the humidity. Follow the steps and make sure both your work utensils and hands are clean.
If you don’t, it’s easy for your hams to go moldy and all the effort will be wasted and the meat will have to be thrown away.
Start with smaller hams
I mentioned it above but use smaller pieces of ham (e.g. 500 – 750 grams) to start with. My experience is that the smaller the ham, the less can go wrong in the beginning.
Once you have made a few hams and understand the aging process, you can dare to use thicker hams.
5 + 28 more delicious ham recipes
The production works exactly as in the basic recipe. For some varieties I have linked even more detailed instructions.
Beef ham (Bresaola)
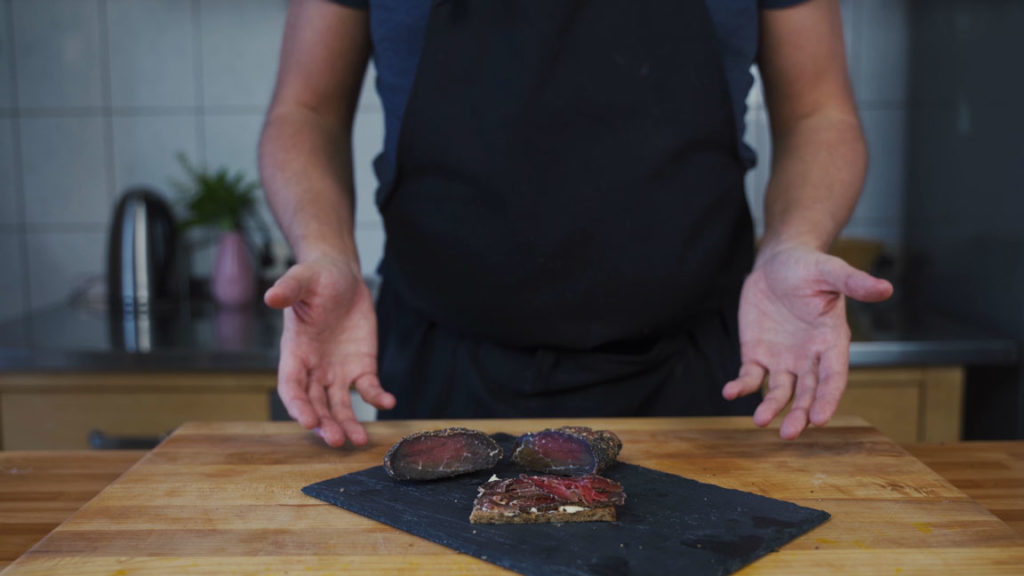
Here you can find my beef ham (Bresaola)
Duck ham
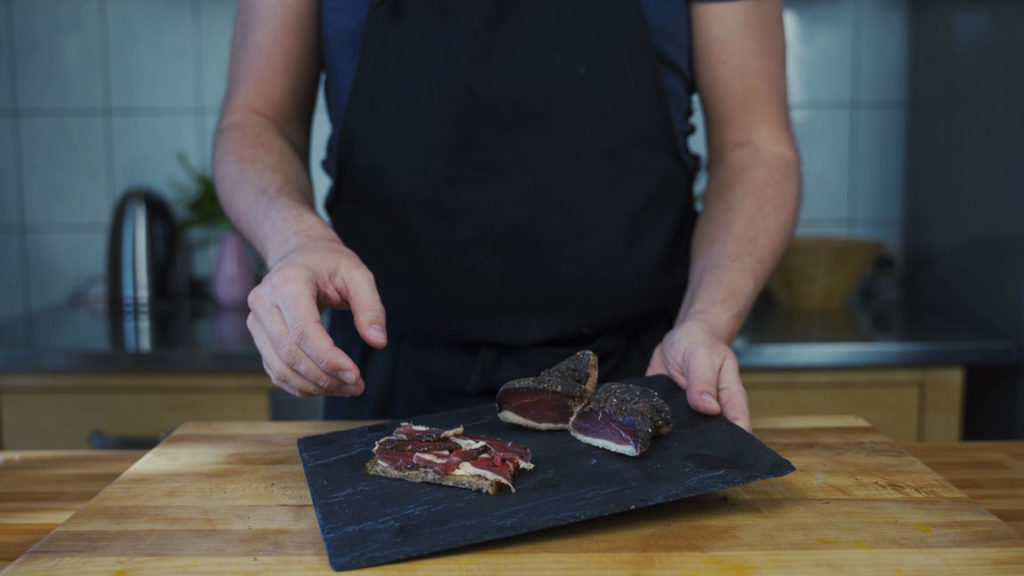
Here you can find my duck ham
Make your own bacon

Here you can find my Bacon
Guanciale
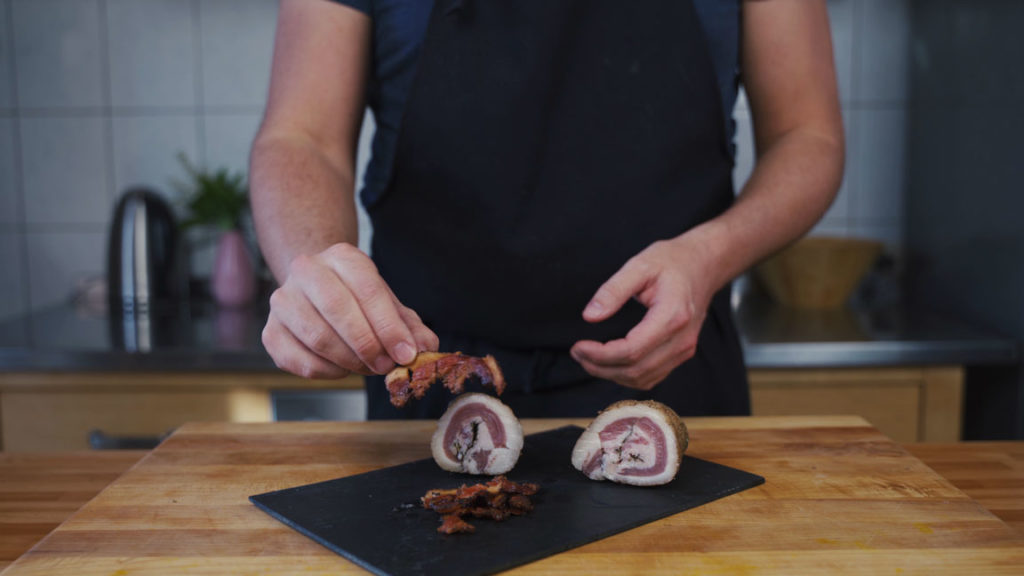
Here you can find my Guanciale.
Lachsschinken (Pork Loin Ham)
28 more delicious ham recipes
In my ham book you will find detailed instructions and many more delicious recipes.
Questions & answers about making ham yourself
How can you tell that the ham is bad?
Your ham is spoiled if it is greasy and has a sour smell. It is also unsalvageable if greenish mold is visible.
What is the shelf life of ham?
In one piece, your ham will keep for several months if stored in a cool place. When sliced, you can eat it for about 2 weeks.
My ham is moldy, what can I do?
If you see that your ham is moldy, you can wash it with a little vinegar water. You can repeat this process more often if necessary.
The more the ham matures and thus dries, the less likely new mold will appear.
IMPORTANT: This only applies to white mold to a small degree. If you are unsure, better throw your hams away and don’t experiment.
Can I make my own ham without Cure?
Yes. But you can’t with the method of curing in your own brine described here.
You should never completely avoid curing salts without the right knowledge, otherwise your ham will spoil due to possible growth of bad bacteria.
In addition, there is a risk of botulism.
Production without Cure is even more difficult. When someone produces ham without Cure, perfect conditions are created and a different curing method is used.
My ham has a dry edge, what can I do?
If you don’t have a curing chamber, it can quickly happen that the ham dries out at the edge quickly and forms an unwanted dry edge.
You have one way to combat this:
Vacuum cure the ham for a week. This draws moisture from the inside to the outside and the edge becomes softer.
I picked up a 3lb cured & smoked Cutter ham and was wondering if I could just rub it with some spices and hang it in the fridge for a couple months to get it more like prosciutto. I searched the web and no one has a post that I could find that says you can. Everything just lists way to cure fresh/raw pork